 Lens EntryLens Entry
This section shows how to enter lens data in OSLO.
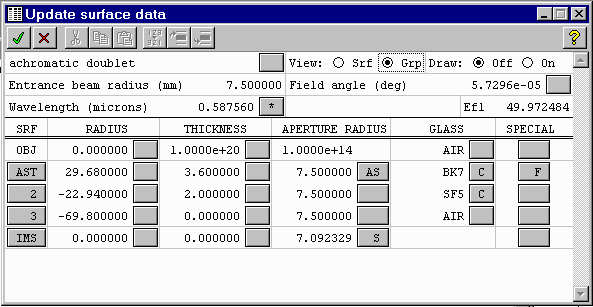
The following lens prescription describes a cemented achromatic doublet. In a cemented doublet, the second surface of the first lens is the same radius as the first surface of the second lens, so that the pair can be joined in intimate contact. The interface between the two elements can then be entered as a single optical surface.
| # | rd | th | ap | glass |
|---|---|---|---|---|
| 1 | 29.68 | 3.6 | 7.5 | BK7 |
| 2 | -22.94 | 2.0 | 7.5 | SF5 |
| 3 | -69.80 | 7.5 | AIR |
where
| # | surface number |
|---|---|
| rd | radius of curvature |
| th | center thickness |
| ap | aperture radius |
| glass | glass name |
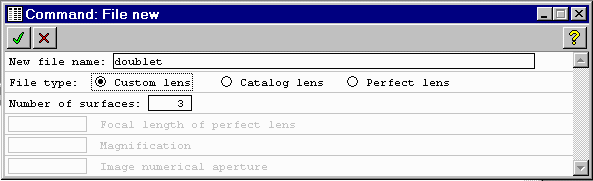
Enter doublet for the file name and 3 for the number of surfaces.
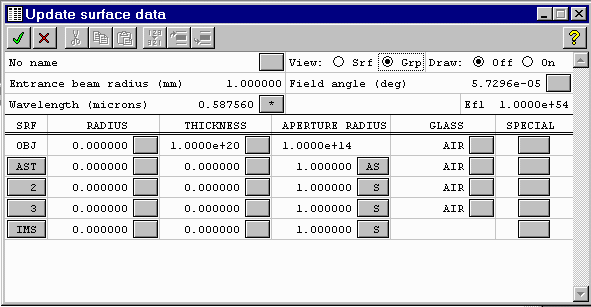
 and the
surface data dialog should open:
and the
surface data dialog should open:
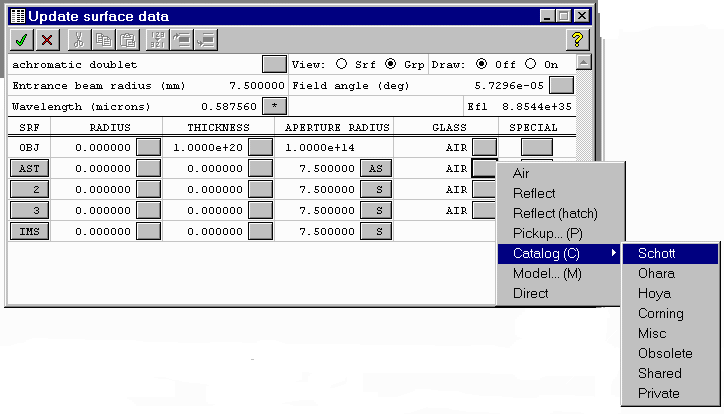
Click in the upper-left field that says "No name", and enter achromatic doublet. This will be used as a title on drawings. Enter 7.5 mm for the Entrance beam radius.
to accept
the changes.
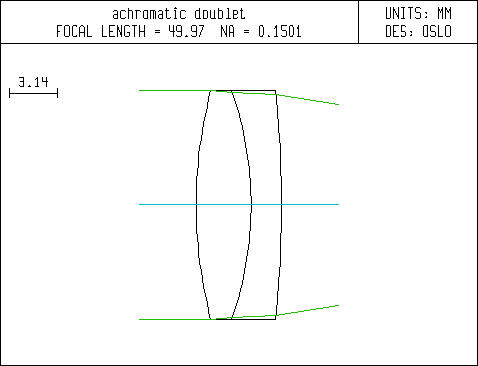
Note: There is a toolbar shortcut for this operation. To find it, let the mouse cursor linger on each of the toolbar buttons. A brief description of each button should appear. Look for the one that says Draw the lens in plan view with default rays
Maintained by John Loomis, last updated 11 Sept 1998