Download: design files
There are four steps involved in programming the DE2 board

|
To setup a new project, first copy any existing design files into a new folder. For this project, download and unpack design files from diglab1.zip
Select File - New Project Wizard from the top menu.
The New Project Wizard helps you create a new project and preliminary project settings, including the following:
You can change the settings for an existing project and specify additional project-wide settings with the Settings command (Assignments menu). You can use the various pages of the Settings dialog box to add functionality to the project.
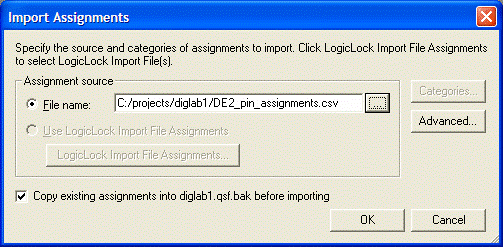
Select Assignments - Import Assignments ... from the top menu.
|
The DE2 board has a default set of pin assignments (and associated
pin names) in | 
|
Choose Processing – Start Compilation from the top menu. The compilation processing may take awhile. Below is a screen capture after compilation.
Choose Tools – Programmer.
|
Make sure the USB cable is in place, and USB Blaster is the
selected device. Check the If the USB Blaster is not the selected hardware device, you can press the Hardware Setup button | 
|
Maintained by John Loomis, last updated 18 January 2008